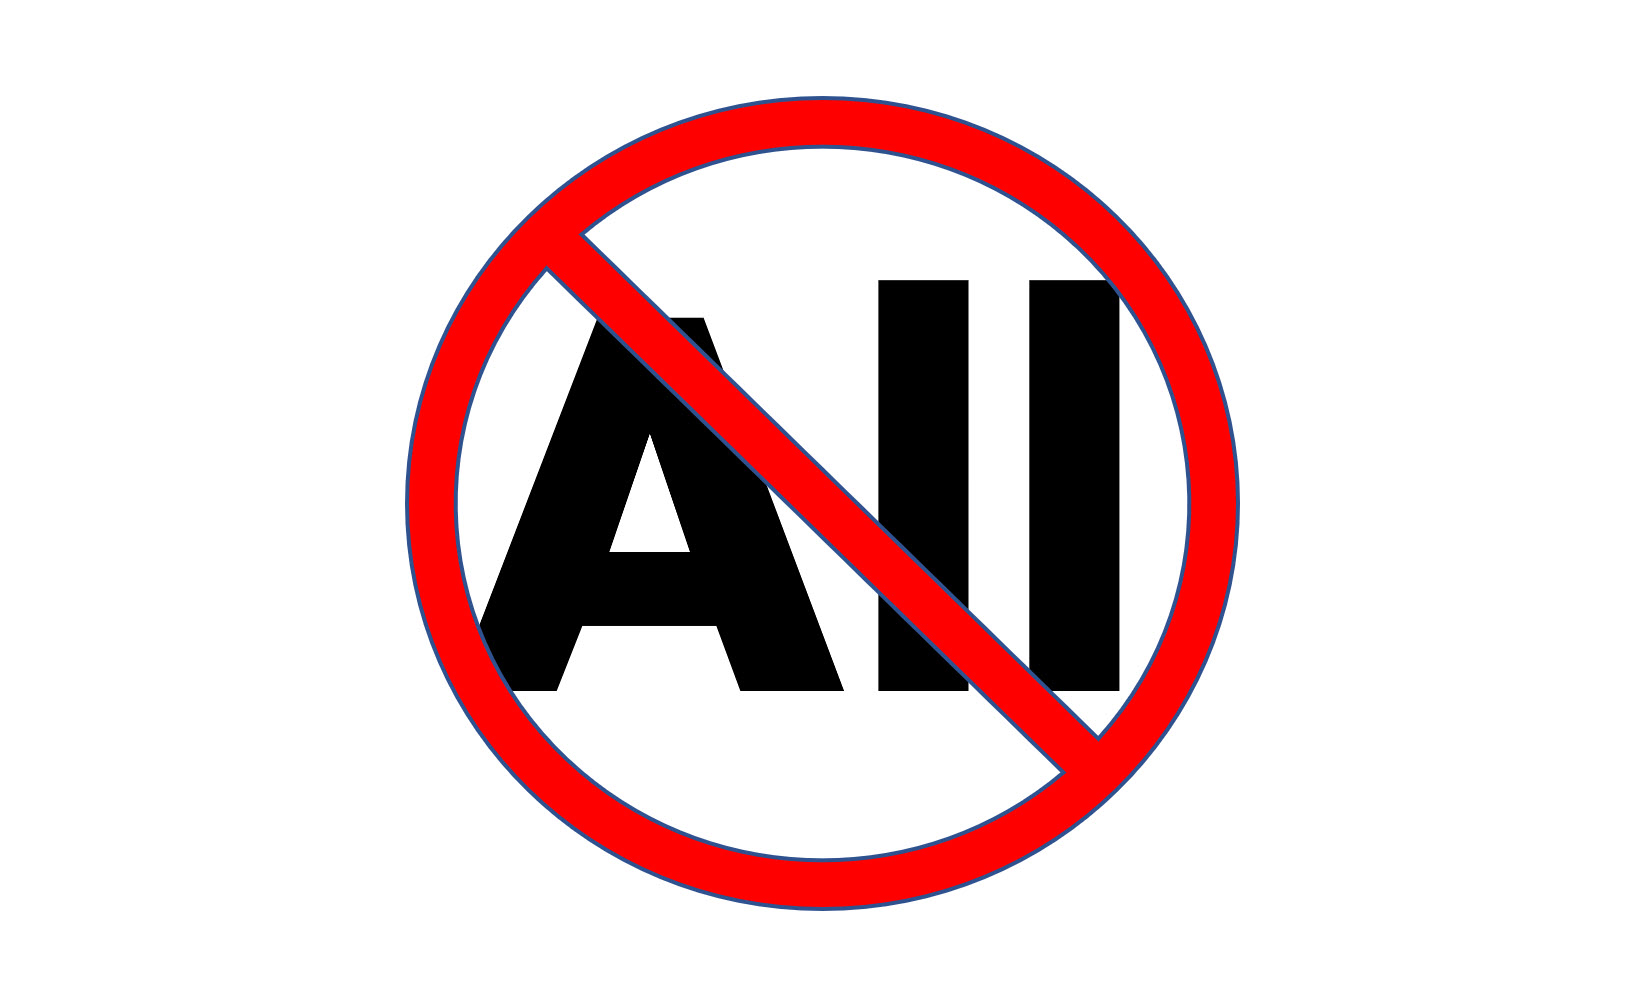
What’s the goal here? Hiding the “All” option in a dashboard’s Interactive Filter.

Background:
In a scoped application, I have multiple dashboards that use the same interactive filter. The reports in that dashboard show values from a custom table which is updated weekly with a scheduled script execution. The day the script runs is the date added to a second custom table that contains the report run date. This is used to populate an interactive filter that is on each of these dashboards.
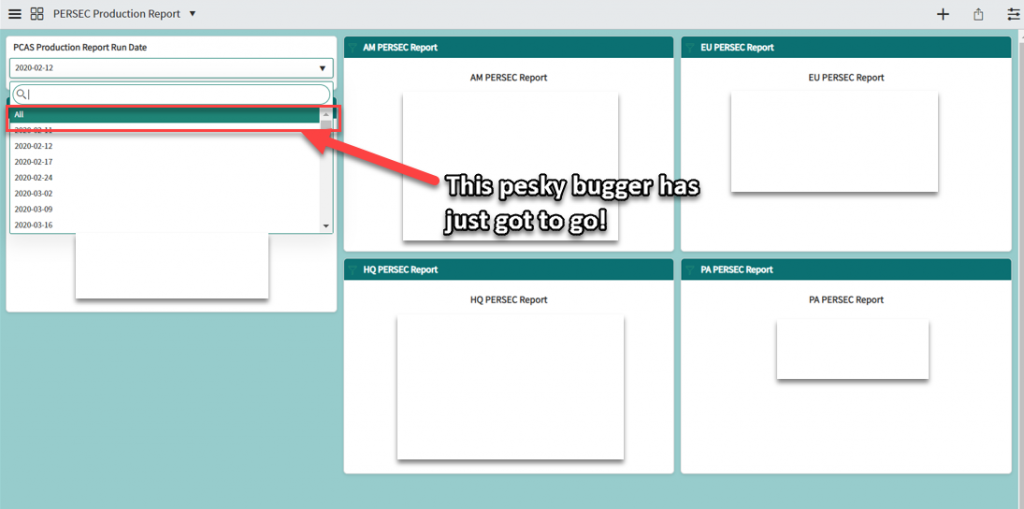
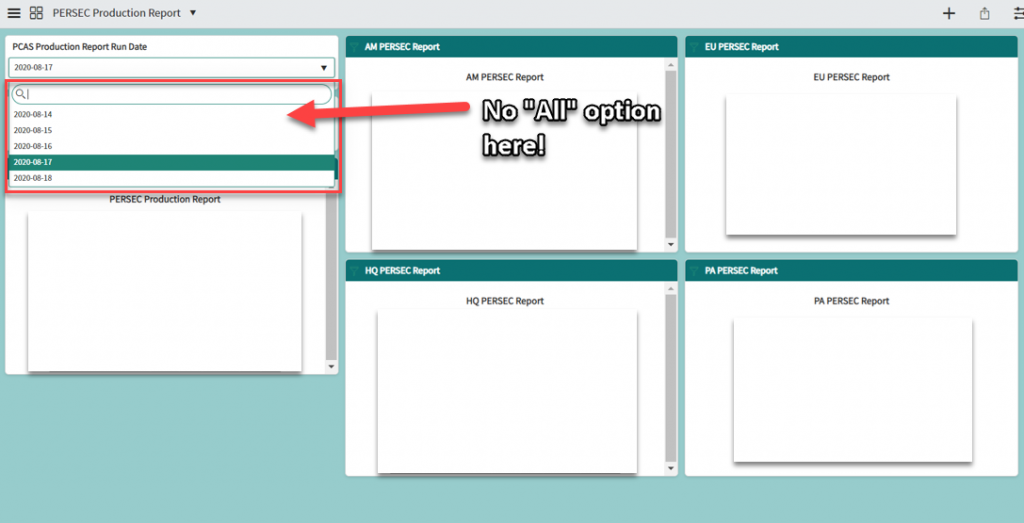
That interactive filter automatically adds an “All” option as the first option.
I needed that All option to go away because it pulls multiples of the same referenced records due to how the custom records are created and this duplication creates inaccurate reporting.
My Research:
You would think that there would be a configuration in the interactive filter to turn off that “All” option – no such luck!
In my research, I also found that many people have been looking for a solution to turn that “All” option off for similar reasons and I haven’t found a custom coded solution that works.
So, I started looking at a way to use some tomfoolery to mess with the DOM elements to possibly hide the first option that way. This led to some interesting discoveries.
The first thing I found is that the options are not a normal <select…> html element.
I also found that when one clicks on the field containing the options, it actually appears that some ajax runs that dynamically creates the options.
Those options are created in a series of hierarchical HTML elements – not easily reached – or so I thought.
My Solution:
This solution incurs some bit of a compromise, but one that is worth the compromise to hide the “All” option.
- Yes, I was able to figure out a reasonable solution and offer it here for your review and use.
- My concept was to somehow intercept whatever is calling the ajax when a user clicks on the option field then do something to capture the returning option values and hide the first one – the “All” option.
- Instead, through a contributor on stackoverflow.com, I found a javascript function that waits for the DOM to change then allows me to enter an HTML ID to look for. If that ID is found, then I can do something. This was a major breakthrough. I like to give credit where credit is due, so I added the URL to the article in the comments of my code–see below.
- What are the details of the solution? There are 3 connecting pieces that make up the whole solution.
- A UI Page (sys_ui_page table). In this page’s Client script box is that javascript function I mentioned above. It simply waits for the DOM to change – which happens when a user clicks the drop down field of the interactive filter – and then it looks for a specific HTML element ID that I know (after much searching with Chrome dev tools) houses the returning HTML elements that comprise the interactive filter options. In that returned HTML, I assume that the first series of HTML elements contains the “All” option and do a simply javascript style call to hide it. I also to a quick check to ensure that somewhere in the multi-leveled HTML structure is the “All” string before I do the javascript hide.
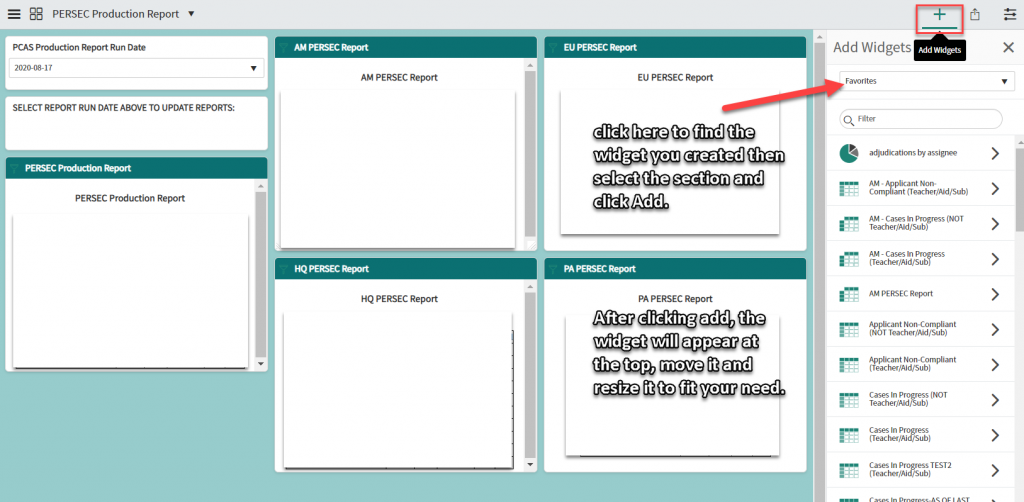
- A Widget (sys_widgets table). This is needed so I can get the code contained in the UI page onto each dashboard. This widget is a basic widget – I started by looking at the out-of-the-box world clocks widget, researching how to create widgets for dashboards and I eventually figured out how to create a bare-bones widget capable of calling the needed UI page above.
- Adding the Widget to each dashboard. To get this code to interact with the interactive filter, the code must be on the dashboard. I found after some trial and error that the code in the UI Page called in by the widget will run and affect anything on the dashboard page – meaning javascript in the Client script box of the UI Page will interact with any bit of the DOM on the dashboard – pretty darn snazzy! Here’s where the compromise is incurred—putting a widget a dashboard isn’t very flexible–you can’t really insert it so it’s not visible to the end user. Because it’s visible to the end user, it might cause some end users heartburn—they may not like it. So, placement can be an issue. I went with an option to try and make it seem like part of the user interface.
The Code:
Here are screen shots and code snippets for you perusal:
The UI Page:
Filling out the form:
- Name: choose your name (this is used in the widget code)
- Category: General.
- Description: Whatever you need to understand what this page does.
- Direct: Unchecked.
- HTML: Leave blank.
- Client script: here’s the code snippet:
// source for waiting for the DOM to change
// then check if a particular element with a ID exists
//https://stackoverflow.com/questions/37374117/continuously-check-if-something-exists-and-do-something

/*
So this is what's happening here:
1. The function below with the window.addEventListener waits for the DOM to change
2. In the Interactive Filter widget, when we click on the option box some ajax runs to grab the applicable
options based on the interactive filter's configuration
   a. Then a dynamic set of options is created - each having the class 'select2-results-dept-0'
   b. The very first option is the one that is created with the value of "All"
   c. These are all enclosed in an HTML element with the id = "select2-drop"
*/
(function(doc,found) {
	window.addEventListener('DOMSubtreeModified', function() {
		var yourdiv = doc.querySelector("#select2-drop");
		if(found && !yourdiv){
			// Was there but is gone, do something
			found = false;
		}

		if(yourdiv){
			// Found it, do something
			found = true;
			/*
			remove the first element with a class of 'select2-results-dept-0'
			but be sure its innerHTML contains 'All'
			*/
			var interactiveFilterOptions = document.getElementsByClassName('select2-results-dept-0');
			var firstOption = interactiveFilterOptions[0];
			if (typeof firstOption !== "undefined"){
				var firstOptionHTML = firstOption.innerHTML;
				//console.log("firstOptionHTML: " + firstOptionHTML);
				if (firstOptionHTML.indexOf('All') > -1) {
					firstOption.style.display="none";
					// strange, but when the interactive filter dropdown is clicked, the console.log
					// shows many "All" options - but I can live with that
					// as long as the darn All option doesn't appear to end users!
					//console.log("We're hiding the 'All' Option now.");
				}
			}
		}

	}, false);
})(document,false);
The Widget:
Filling out the form:
- Name: Give it a useful name.
- Renderer Type: JavaScript.
- Active: true.
- Roles: I don’t use – use as needed.
- Script: Things to Remember about the ‘name’ section of code:
- For scoped apps, prepend the name value with the scope “x_….”
- Otherwise just add a name of your chosing for the code part for ‘name’ : ‘namegoeshere’
- Code Snippet.
// ensure to prepend the 'name' below with the scoped app's scope "x...."
function sections() {
return {
'SELECT REPORT RUN DATE ABOVE TO UPDATE REPORTS:' : { 'name' : 'x_add_your_scope_here_this_part_must_match_the_name_field_of_the_ui_page' }
};
}
function render() {
var name = renderer.getPreference('name');
return renderer.getRenderedPage(name);
}
function getEditLink() {
if (!gs.hasRole('admin'))
return '';
return "sys_ui_page.do?sysparm_query=name=" + renderer.getPreferences().get("name");
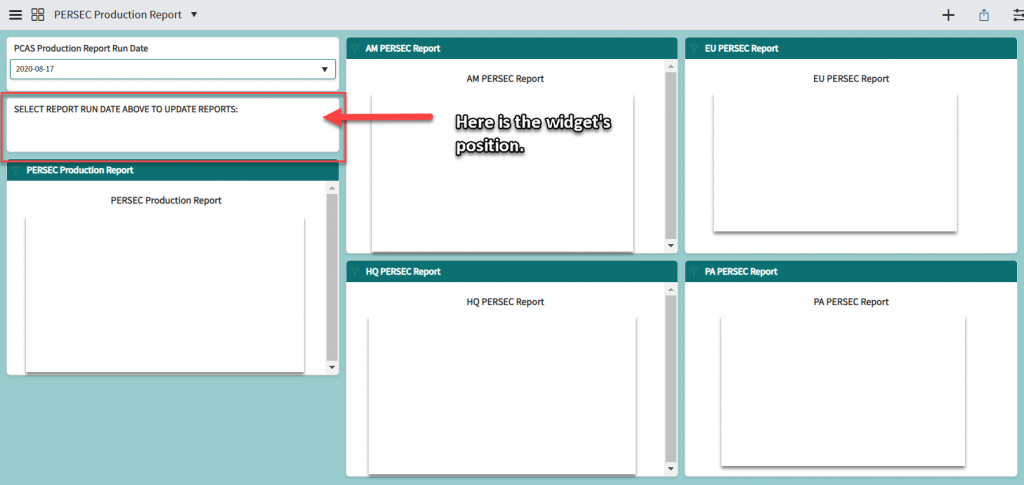
}The Dashboard: You need to add the widget to the dashboard.
Here are 2 screenshots showing how the widget works on the dashboard.
Feel free to use this as your need dictates. If you have any questions, please go to my LinkedIn profile and message me or use the contact me form on this blog.